Today I’m sharing a fun and meaningful project that also makes a fantastic personalized gift—a custom-engraved Zippo lighter. I recorded the full process and would love for you to watch the video if you want to see how everything comes together in real time, from design planning to final polish. It's a great beginner engraving project and perfect for anyone looking for creative gift ideas.
👉 Watch the full YouTube video here

Why a Zippo Lighter?
This project was a birthday gift, and I thought a Zippo lighter would be a unique, long-lasting, and super cool canvas. While I’ve never hand-engraved one before (I've only seen them done with lasers), the matte surface made it perfect for trying it out with my engraving tools.
In the video, I go over all the details, but one quick tip—if you're working on matte materials, skip the paint pens like Uni Posca and instead use a Stabilo pencil for sketching your design. It wipes off easily and works beautifully on surfaces like frosted glass or powder-coated metal.
Designing the Layout
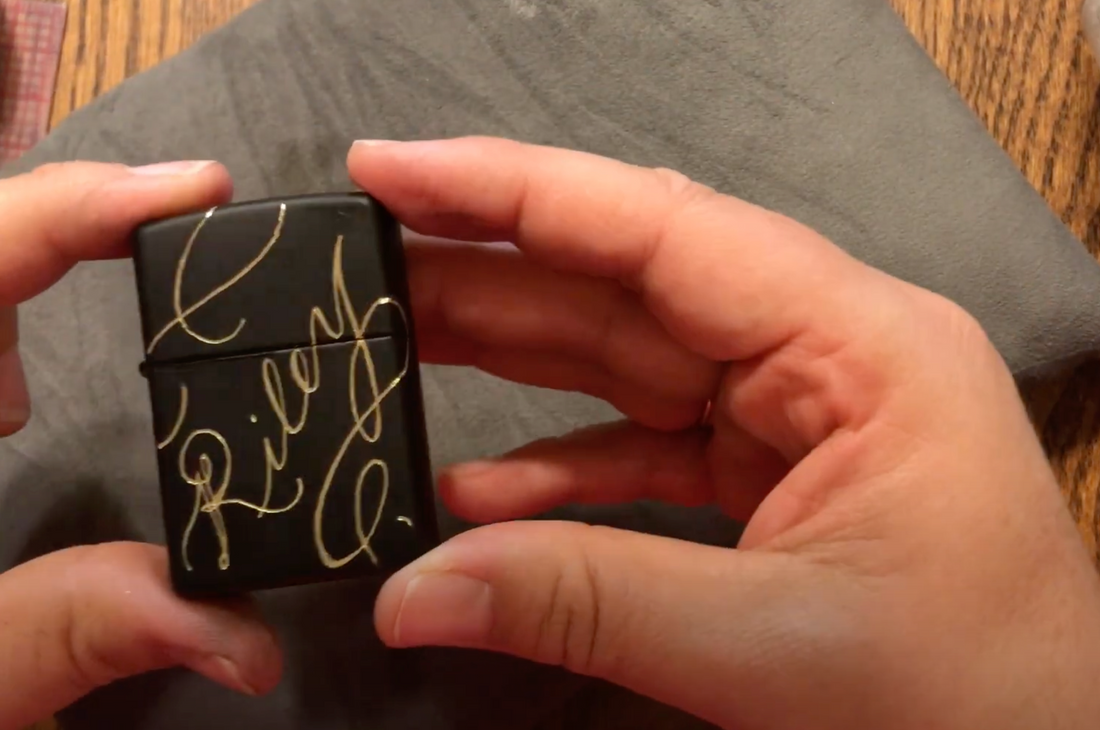
The name going on the lighter was “Riley.” I debated whether to write it small and centered or try something a bit more eye-catching like a diagonal layout. I eventually went with the diagonal design to fill more of the space and give the piece a more custom, flowy look.
Rather than adding florals, I decided on soft flourishes that compliment the Y in her name. It adds a touch of elegance and keeps it from feeling overly floral or feminine, which I think fits her personality better. There’s also a fun idea I played with in the video- possibly adding a September birth flower (the aster) on the back. Watch along to see if and how that came together!
Time to Engrave
In the video, I walk you through exactly how I set up my engraver, including what burr I used and what speed worked best for the coated metal of the Zippo. Spoiler: I used my InkMeThis Mystisa engraver with a diamond bit (46mm), and it worked like a charm!
I also cover:
-
Speed settings for metal vs. glass
-
Why I reuse older burrs for powder-coated materials
-
My setup tips for hand positioning and grip
-
How many passes I do to get clean, smooth lines
It’s all broken down clearly on video, so definitely check it out if you're new to engraving or looking to upgrade your skills.
Final Touches & Reveal
After the engraving was complete, I cleaned off the Stabilo pencil lines with alcohol wipes and made a few small adjustments to refine the flourishes. One really cool surprise? The engraving revealed a shiny gold layer beneath the matte black coating—I expected silver, so this little detail made the final result even more special.
In the end, I was so happy with how it turned out. It’s a completely one-of-a-kind gift that I know she won’t receive duplicates of. Thoughtful, handmade, and personal—exactly what a good gift should be!
Want to Try This Yourself?
If you’re feeling inspired, I’ve got you covered! I’ve linked my Engraving Guide iwhich includes all the supplies I recommend, tool suggestions, and extra tips for creating your own personalized gifts!